How to deploy a Gatsby website to Amazon S3 using Gitlab CI
If you've never heard of GatsbyJS it's an amazing static website generator that will help you to create progressive web apps using the JAM Stack.
More information in case you want to know what a progressive web application is. And this is an explanation of the JAM Stack.
Don't let the word static website generator confuses you. Static does not mean not interactive. With GatsbyJS you can generate modern, interactive websites leveraging the power of React and GraphQL.
One of my goals for this summer is to move my blog (yes, this one you are reading now) from Squarespace to Amazon S3. I'm going to use Gitlab and GatsbyJS. The workflow will be like this:
- I create content for the blog and once all is good changes are pushed automatically to my Gitlab repository.
- Using Gitlab CI the pushed changes will be automatically compiled and deployed to my Amazon S3 bucket where the website lives.
- Changes are live.
As you can see it's a simple but powerful workflow. I can modify anything, add a new post, page, etc... See the new changes applied in my local version and once I'm happy with the result I just need to push the changes to my repo and they will be deployed to my live site thanks to Gitlab CI.
Thanks to the power of git I can revert any change, any time.
Step First: Amazon S3 Bucket
Let's start with the process. The first step is to create a bucket in Amazon S3 that will contain our website. In order to increase security we are going to add a new user with permissions to write only in that new bucket.
Go to Amazon, select S3 and press the "Create bucket" button
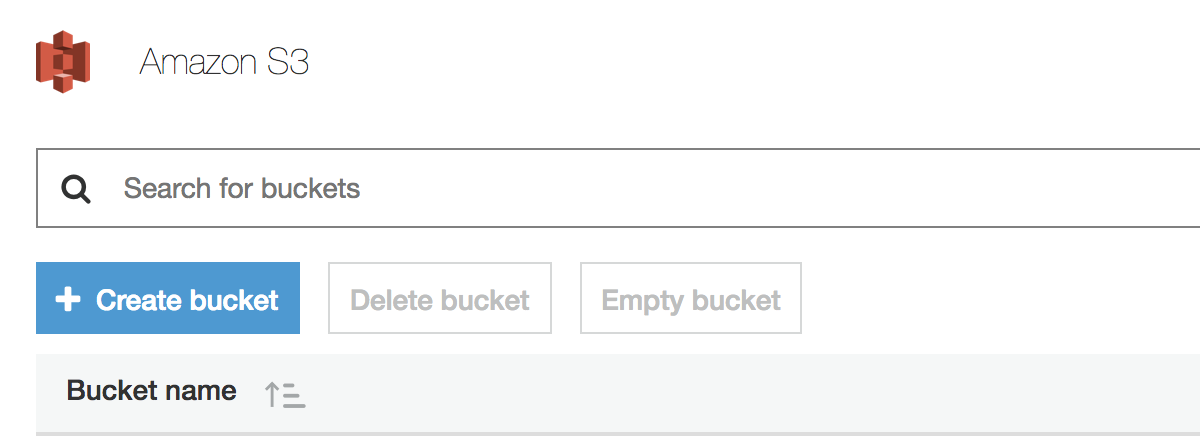
Don't worry about permissions, we will change them later. Just create the bucket with the default options and once it's been created click on it. I'm going to create a bucket called alvareznavarro . Once the bucket has been created you will see a page like this:
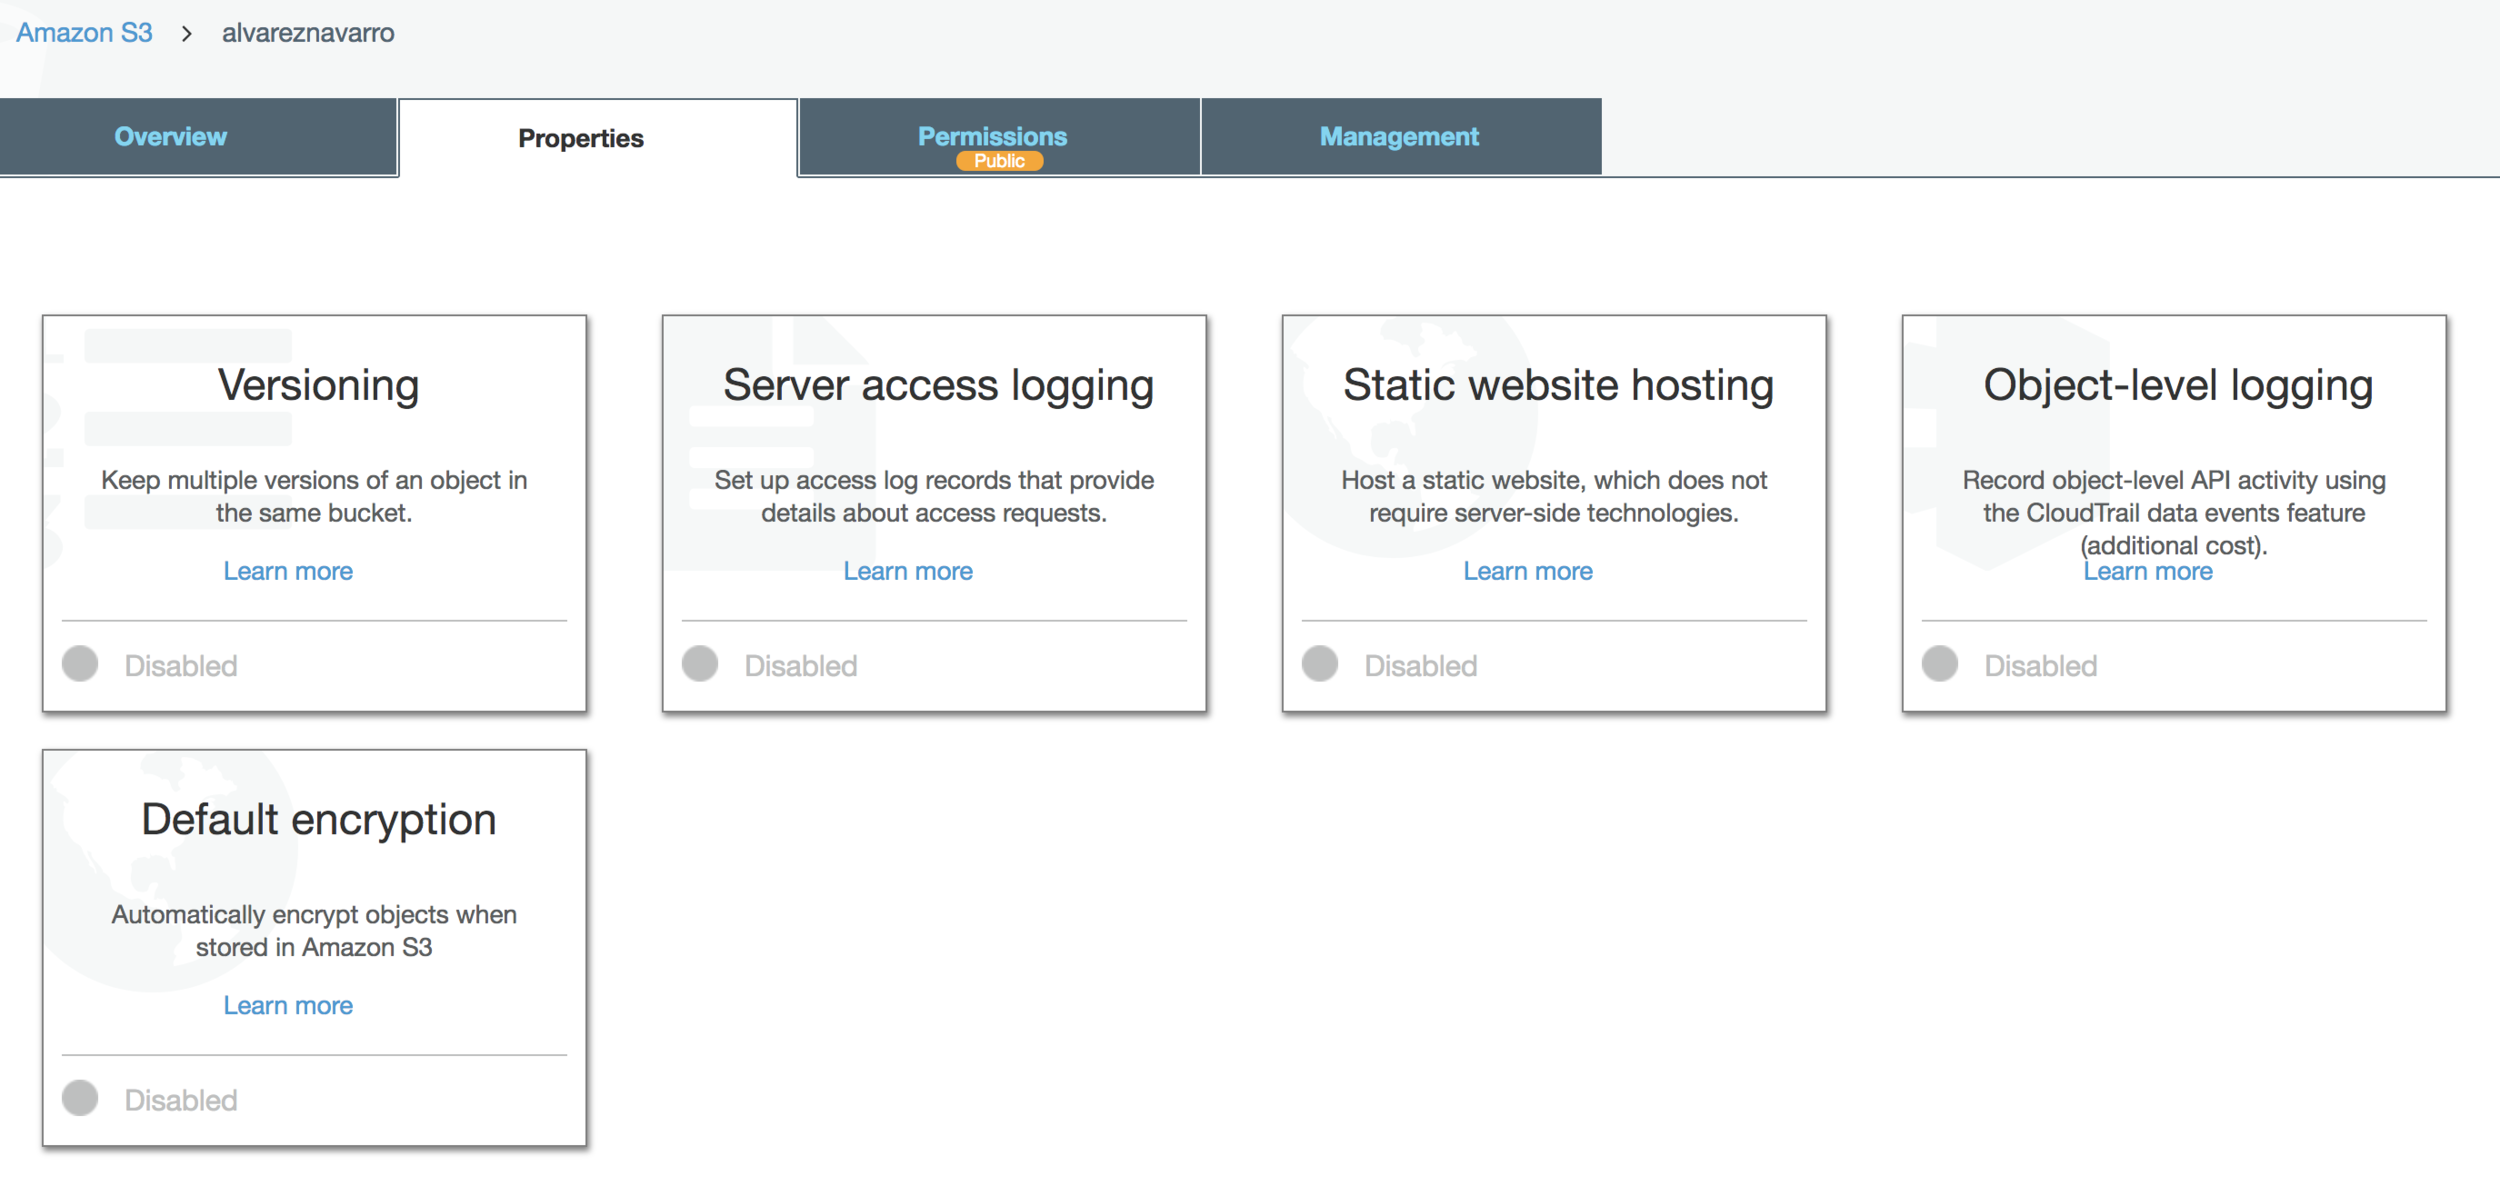
Click on Static website hosting and this is what you will see:
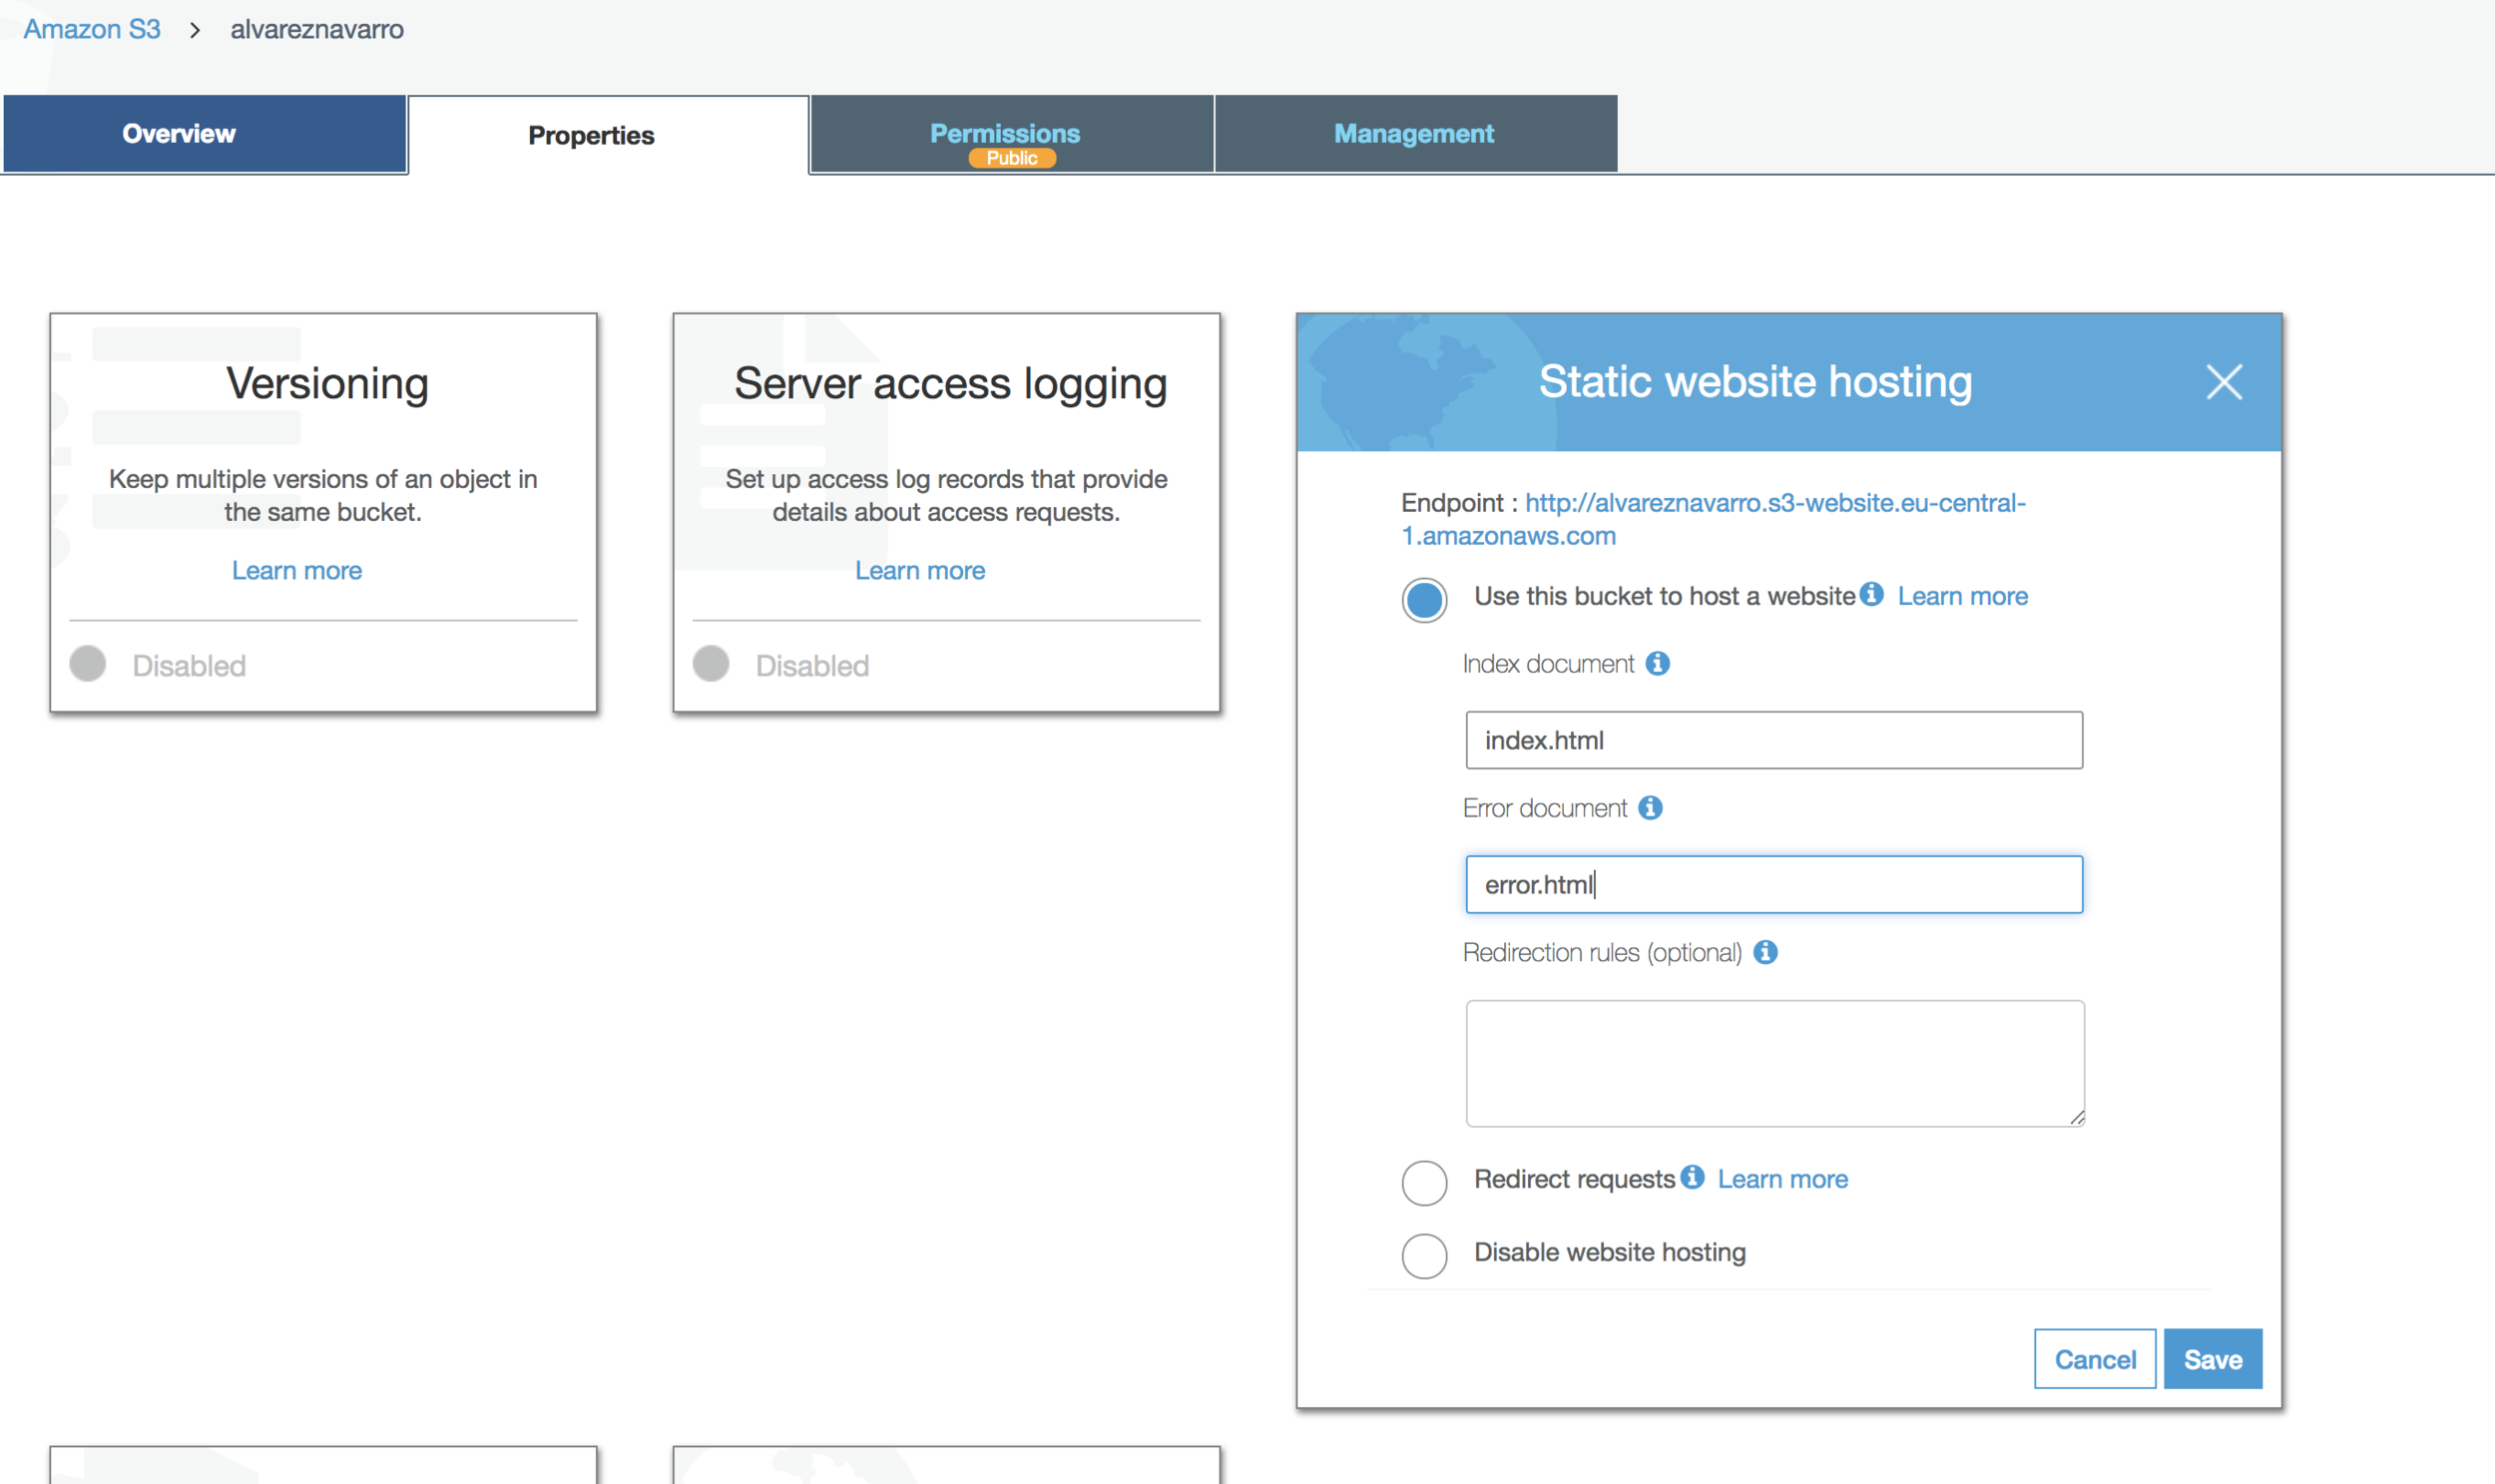
Select the option called: "Use this bucket to host a website" and write the name of your index page. Gatsby uses index.html by default so write that. You can also add an error page. I'm going to follow amazon suggested name and call the page error.html.
You can notice that the visible url of your website appears at the top of the page just before the "Use this bucket to host a website option". It's called Endpoint. You can open that url in a new tab so we can check our website later on.
Now save your changes and you will be back to the bucket configuration page. Press on the Permissions tab and click on the button called "Bucket Policy".
[caption id="" align="alignnone" width="2500.0"] 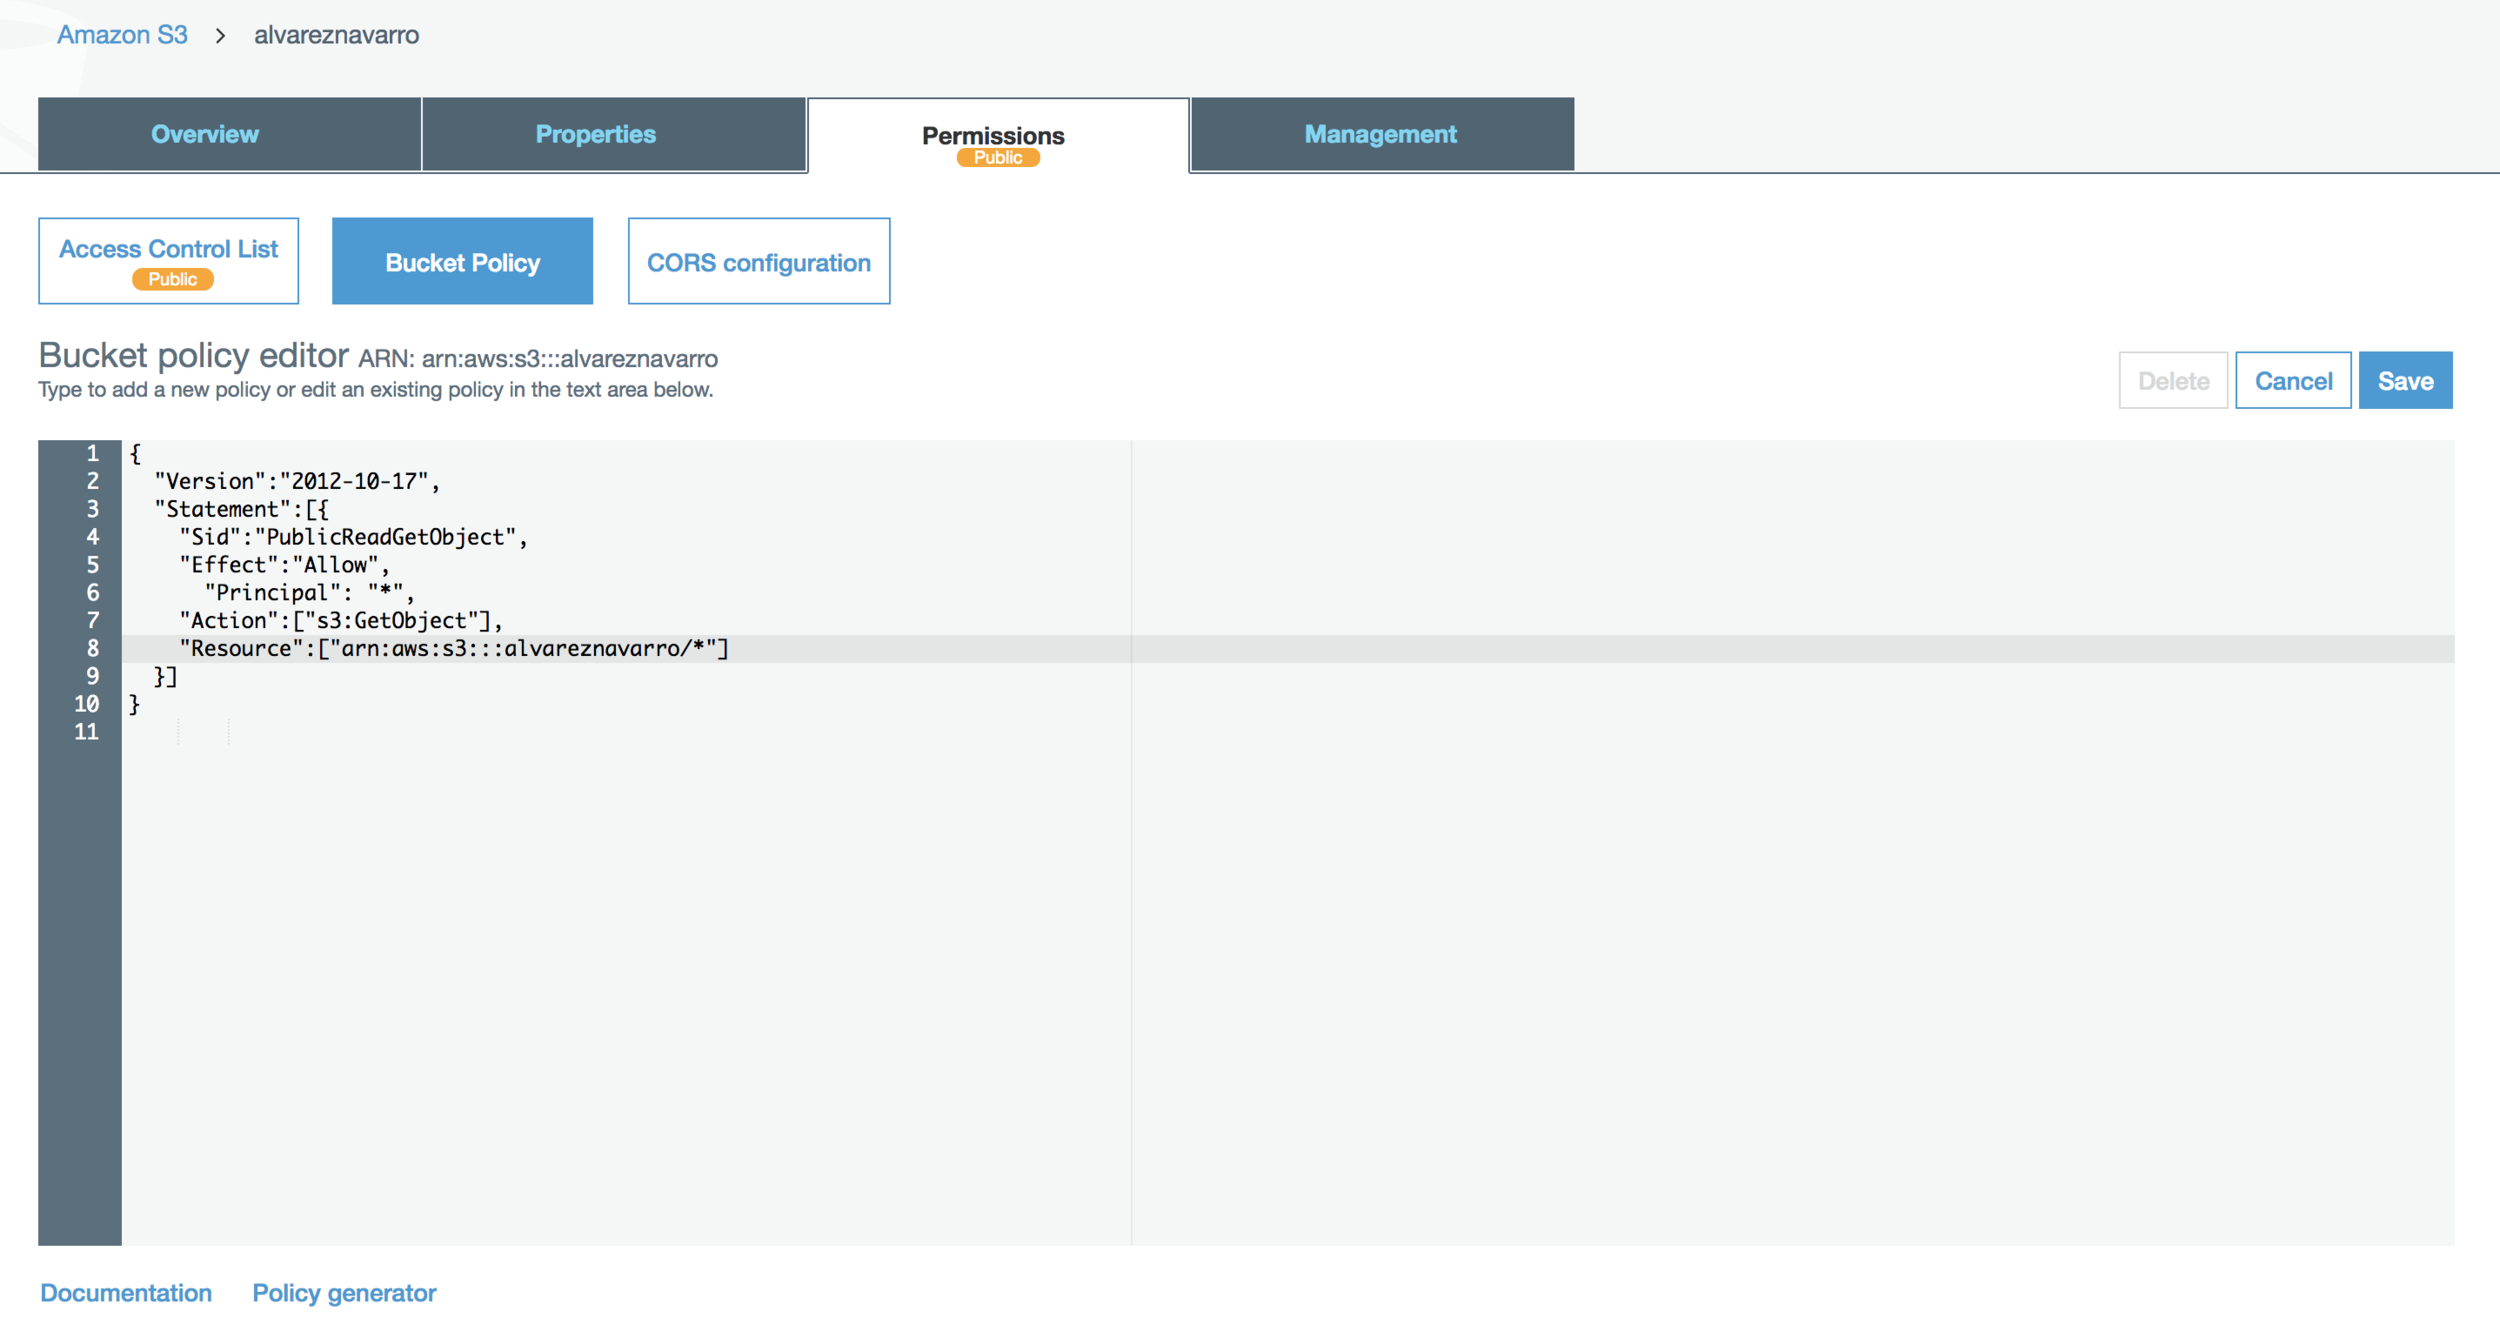 Bucket permission setup [/caption]
We are going to setup the permissions for this bucket. Because it will contain our website we want everybody to be able to read all the contents of this bucket. Everything should be public. Copy and paste this script but remember to replace the bucket name with your own name.
{
  "Version": "2012-10-17",
  "Statement": [
    {
      "Sid":
      "PublicReadGetObject",
      "Effect": "Allow",
      "Principal": "\*",
      "Action": "s3:GetObject",
      "Resource": "arn:aws:s3:::alvareznavarro/\*"
    }
  ]
}
Once this step is done we have am S3 bucket where all the contents will be readable by anybody. So far, so good. Nothing more needed in S3 now go to Services and choose Amazon IAM.
What we are going to do here is to create a policy that allows to write content to that bucket. We will use this policy with a use that we are going to create later on.
Visit Amazon IAM and in the left sidebar click on policies and then the button called "Create policy"
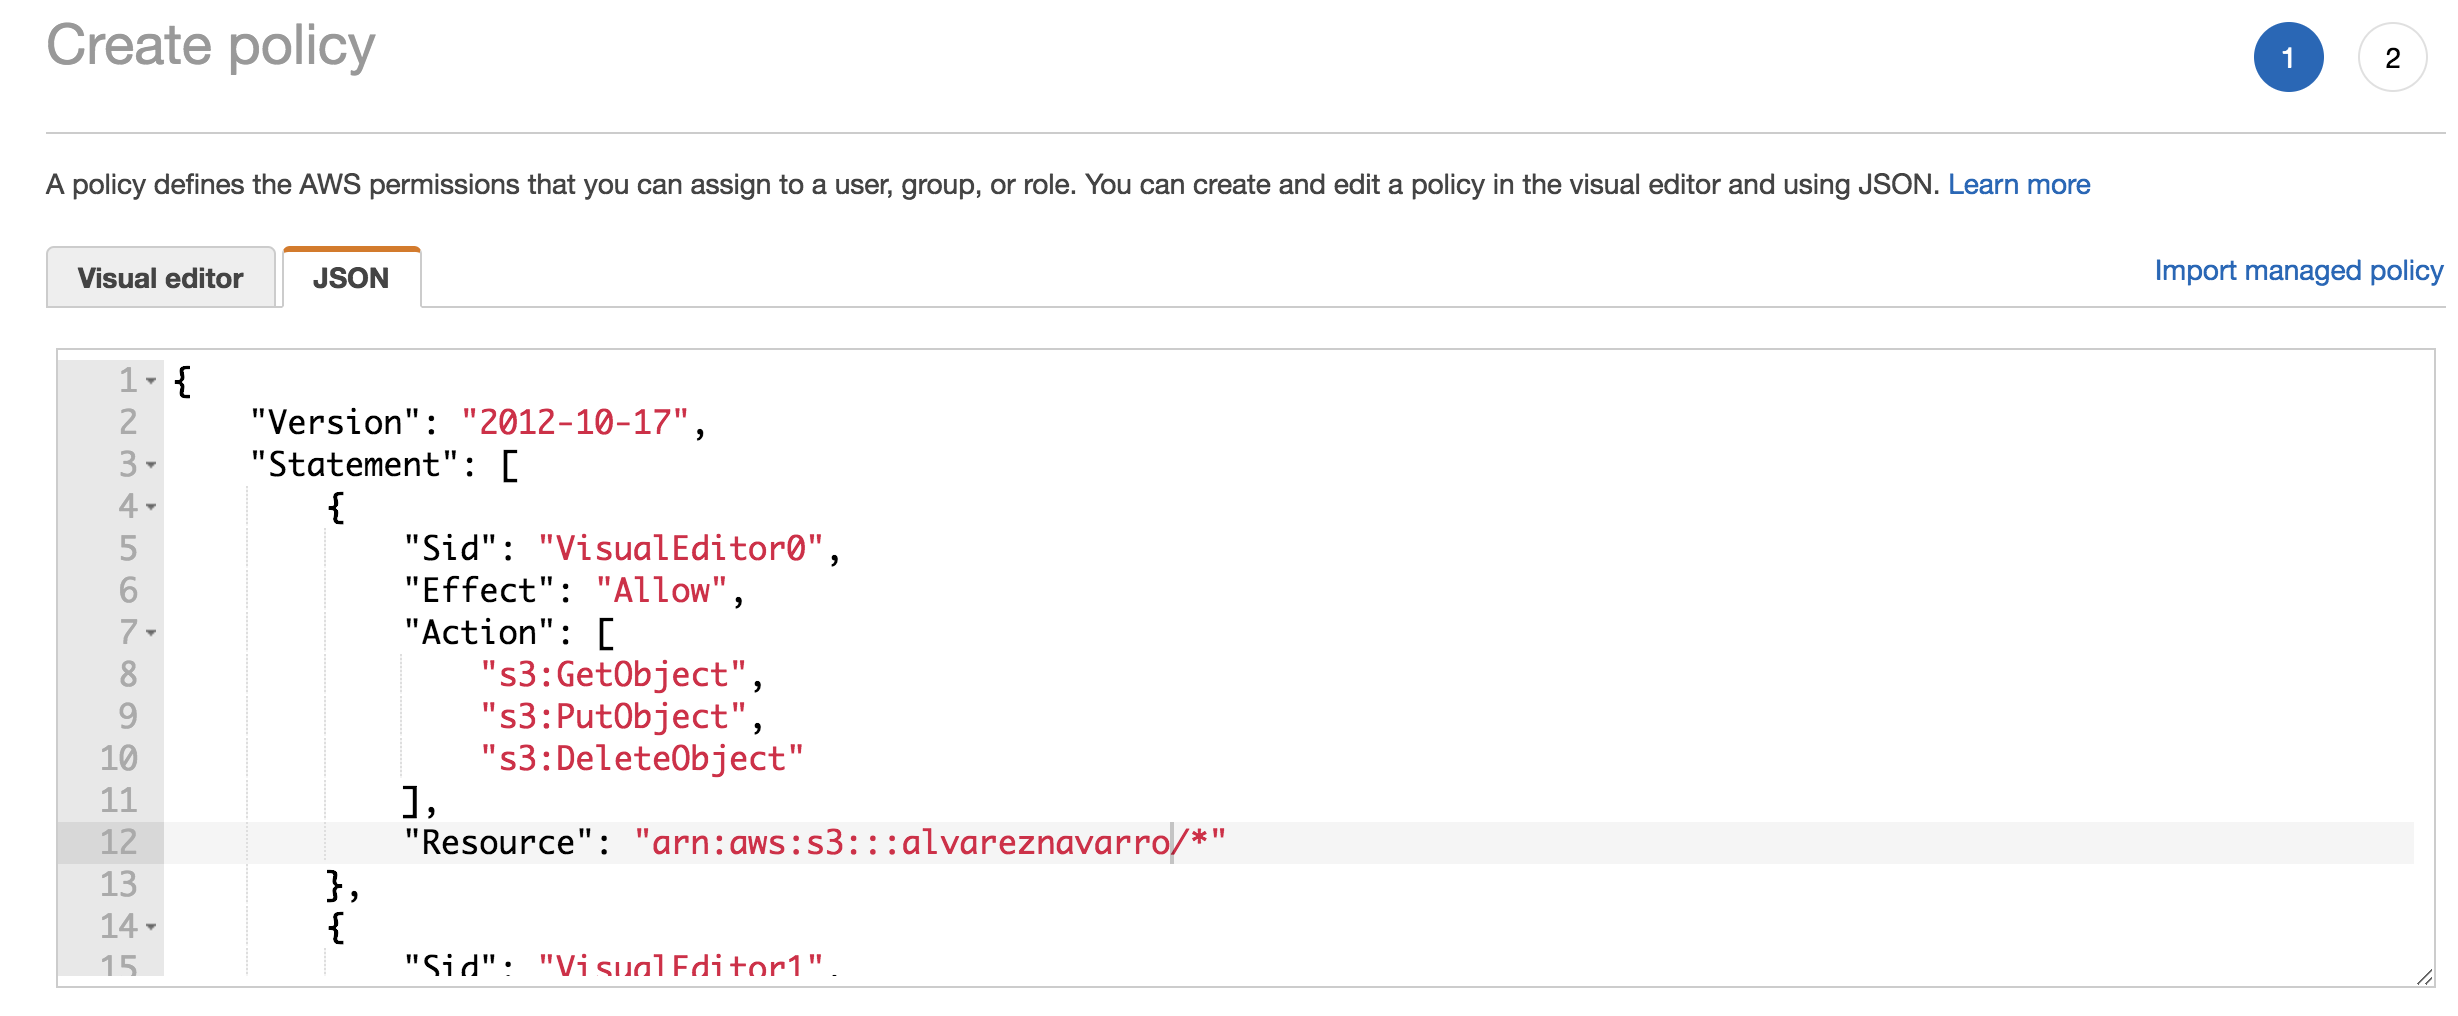
Select the tab named JSON and copy/paste the following script. Again remember to change the bucket name and use your own.
{
  "Version": "2012-10-17",
  "Statement": [
    {
      "Sid": "VisualEditor0",
      "Effect": "Allow",
      "Action": [ "s3:GetObject", "s3:PutObject", "s3:DeleteObject"],
      "Resource": "arn:aws:s3:::alvareznavarro/\*"
    },
    {
      "Sid": "VisualEditor1",
      "Effect": "Allow",
      "Action": "s3:ListObjects",
      "Resource": "\*"
    }
  ]
}
Save the changes and give the policy a name, mine is called publicWebsiteBucket. You can call the policy however makes more sense to you.
Now let's go to the final step in Amazon. We are going to create a new user and we will assign that policy to the user. By doing that we will have a user that can only write content to our bucket but nothing else. If the credentials of that user are compromised then we are limiting the amount of damage we may suffer.
In Amazon IAM in the left sidebar click on the option called Users and then click the button named "Add user"
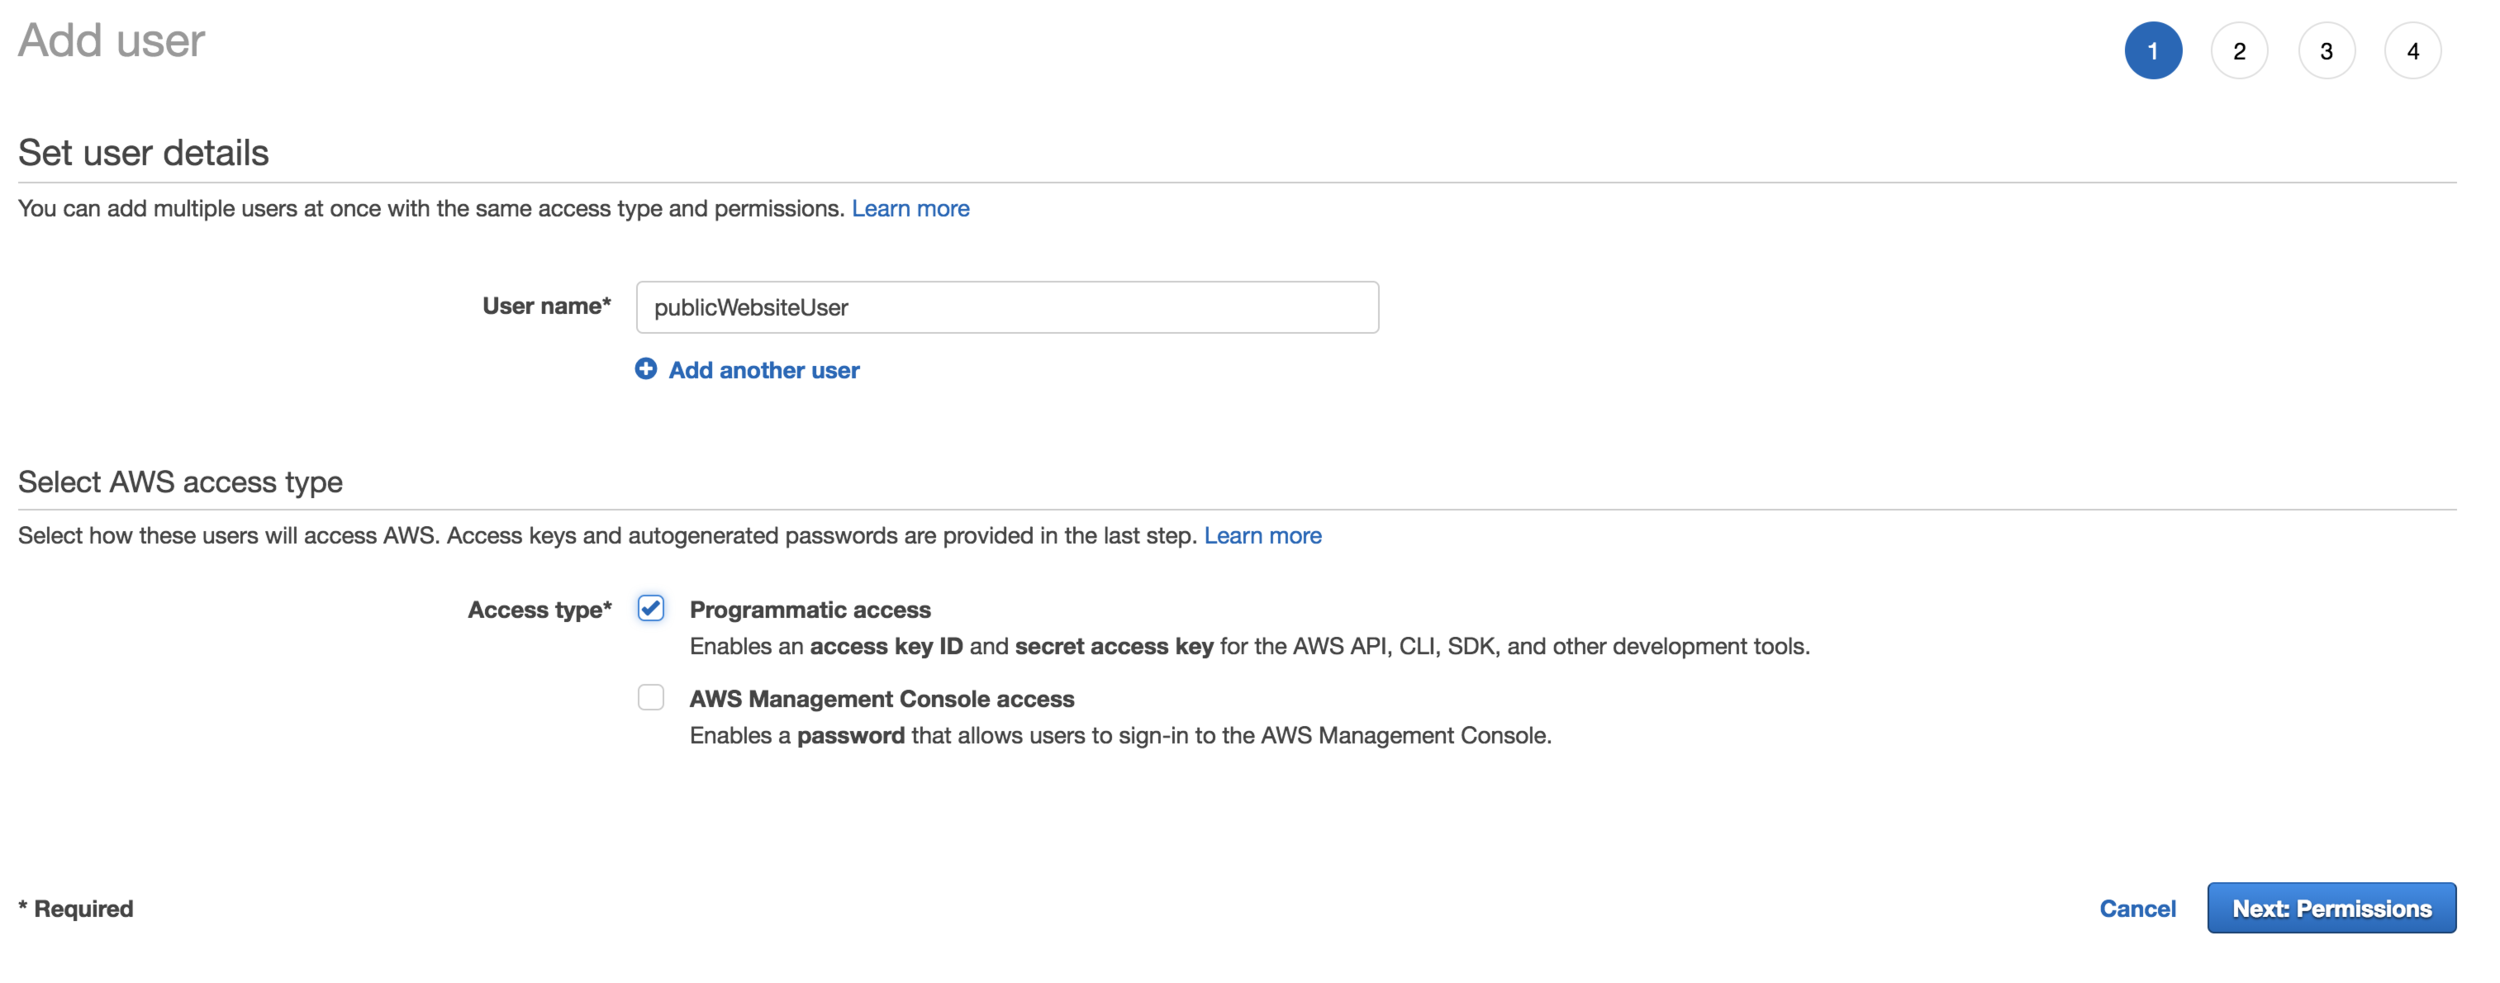
Give a name to your user, mine is called publicWebsiteUser and select the Programatic access option then click "Next: Permissions".
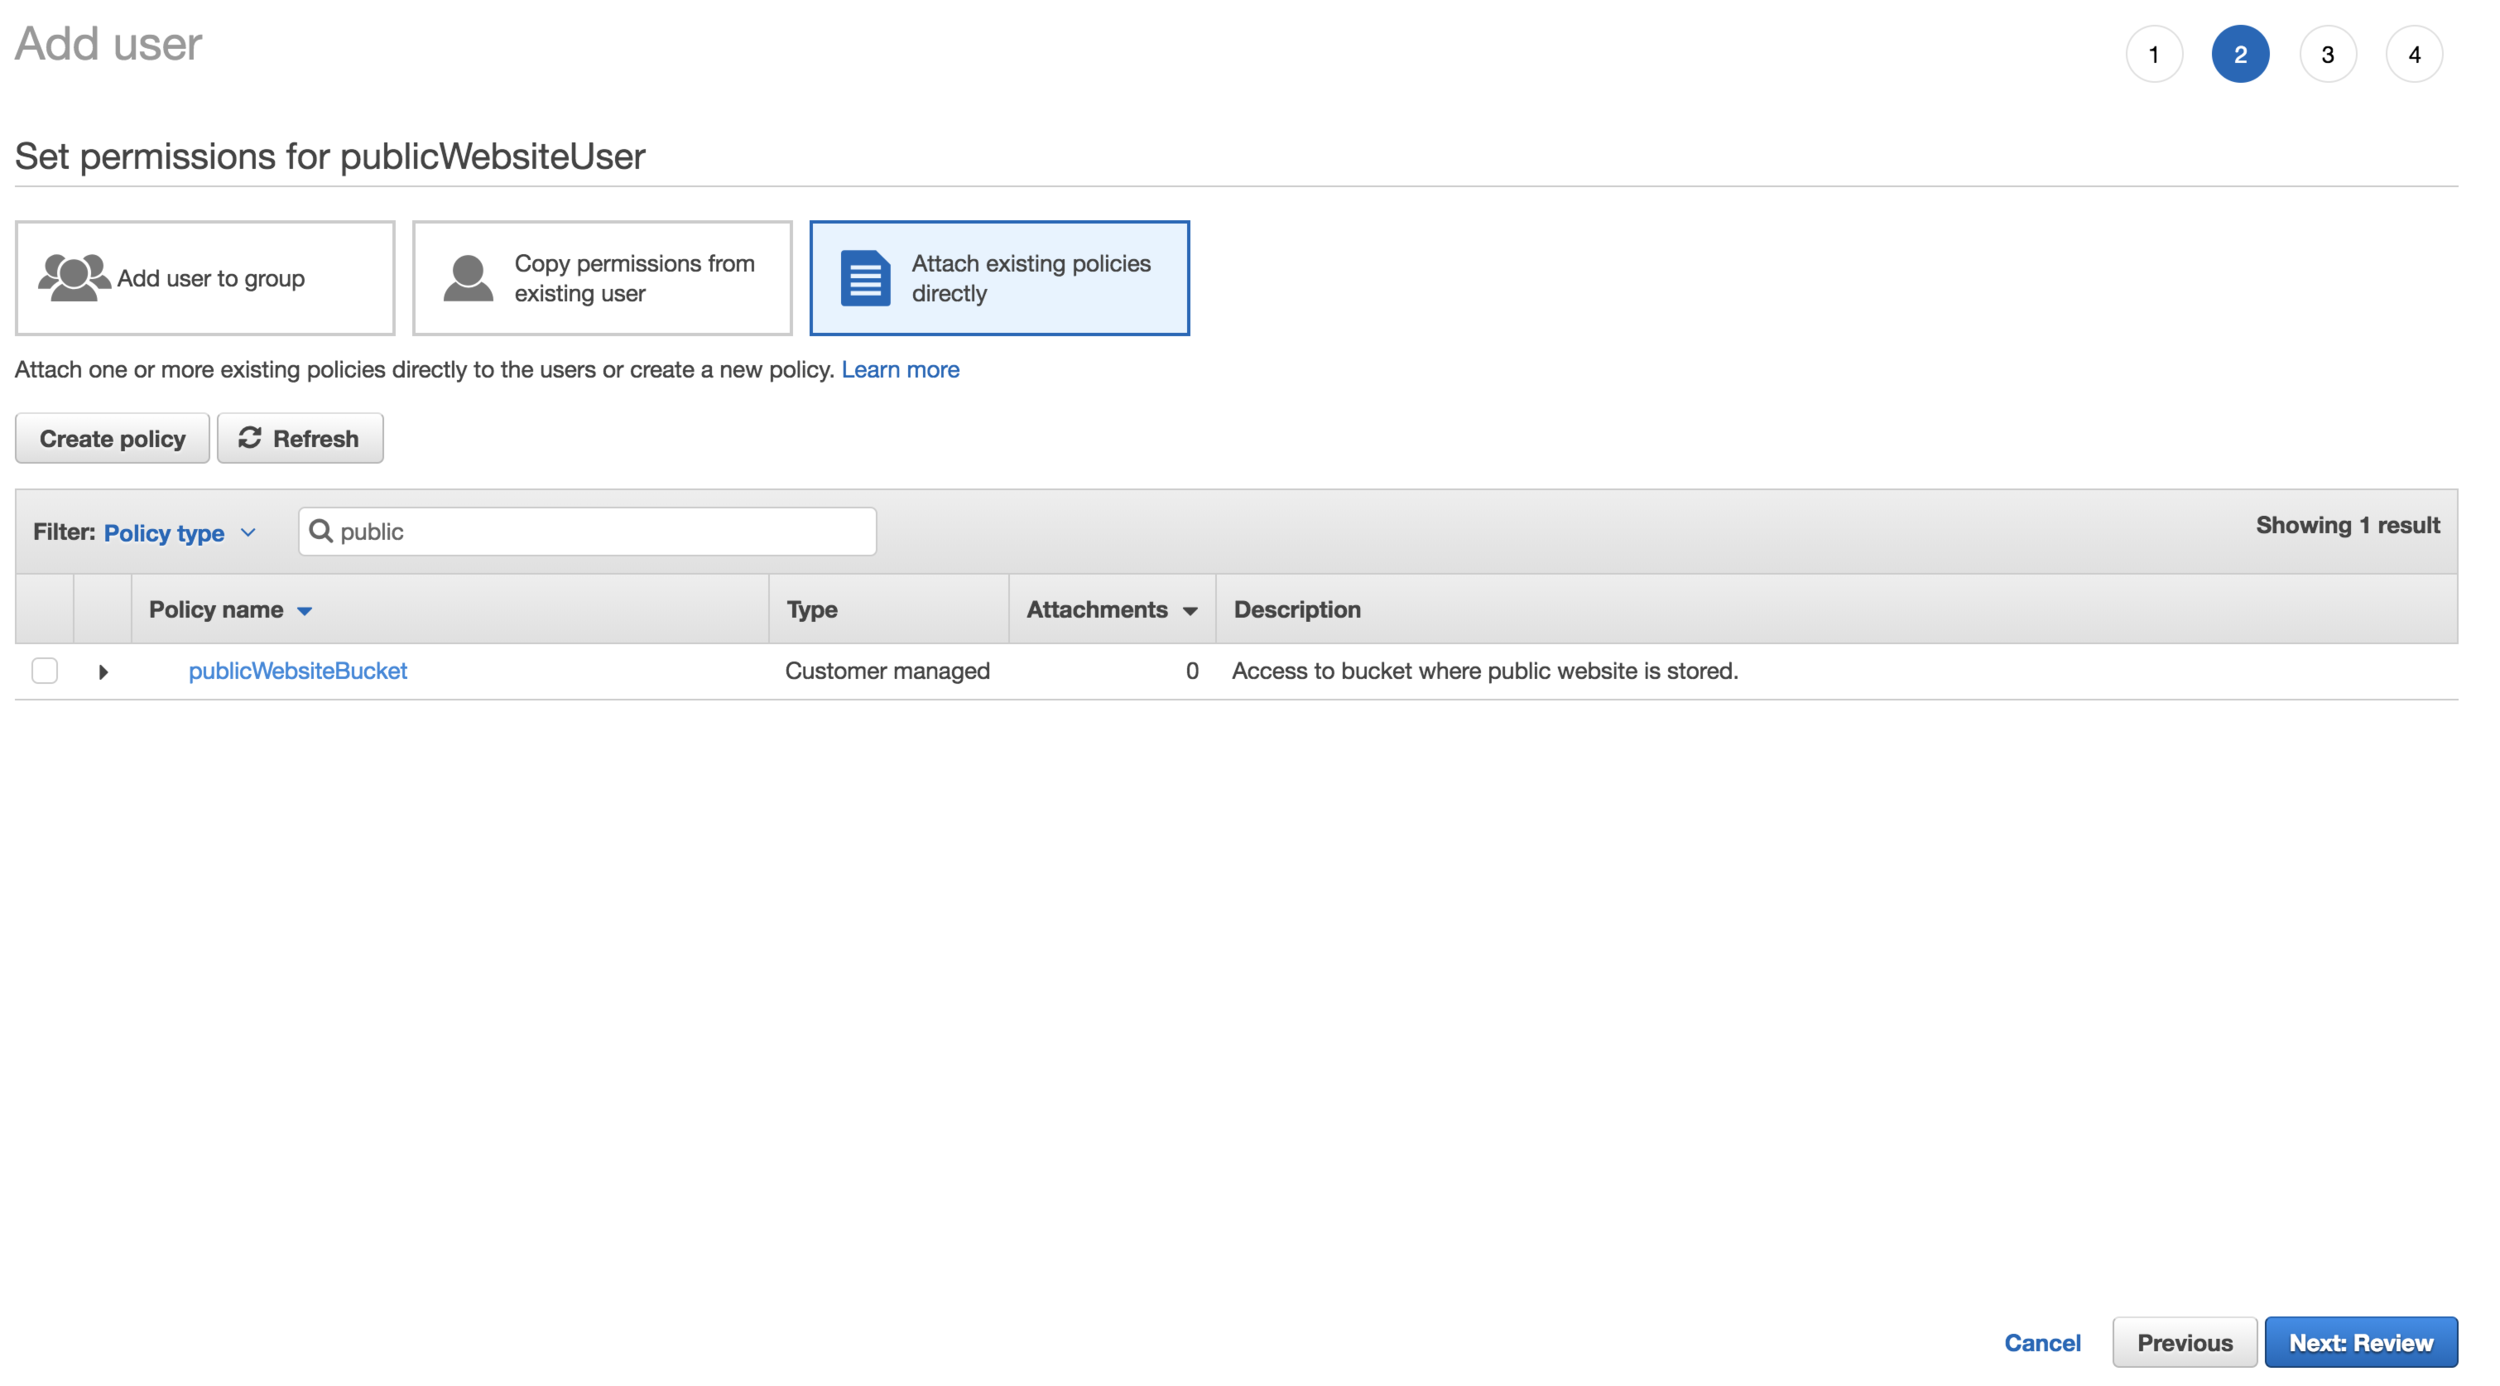
We are going to attach our policy to this user and the way of doing so is by clicking on the "Attach existing policies directly" tab. You will see a list of all policies. Go to filter and search for the name of the policy you've created before. Then select that policy by clicking on the left checkbox and click "Next: Review".

Now you can see your new user and the credentials assigned to this user. This is the last time you will be able to see these credentials so copy them and save them because we are going to use them later on in Gitlab.
Let's recap what we've done so far.
- Create a new bucket and configured as Static website hosting.
- Update the bucket permissions to be readable by everybody.
- Create a new policy that allows to write content to the bucket.
- Create a user and assign the policy created in step 3 to this user. Now this user can only write content to our bucket and nothing more.
Now it's time to move to Gitlab.
Step Two: Gitlab repository
Create a repository in Gitlab. Give it the name that better suits your needs. I'm going to name it alvareznavarro same as the S3 bucket so I don't need to remember a lot of names. The permission is not important. You can create the repository public or private. I think public makes more sense because all the content is going to be public in you website anyway.
Go to the repo and in the left sidebar click on Settings ->CI/CD. Click on Variables and here you need to add the credentials that you copied when you created the Amazon User. Check this screen:
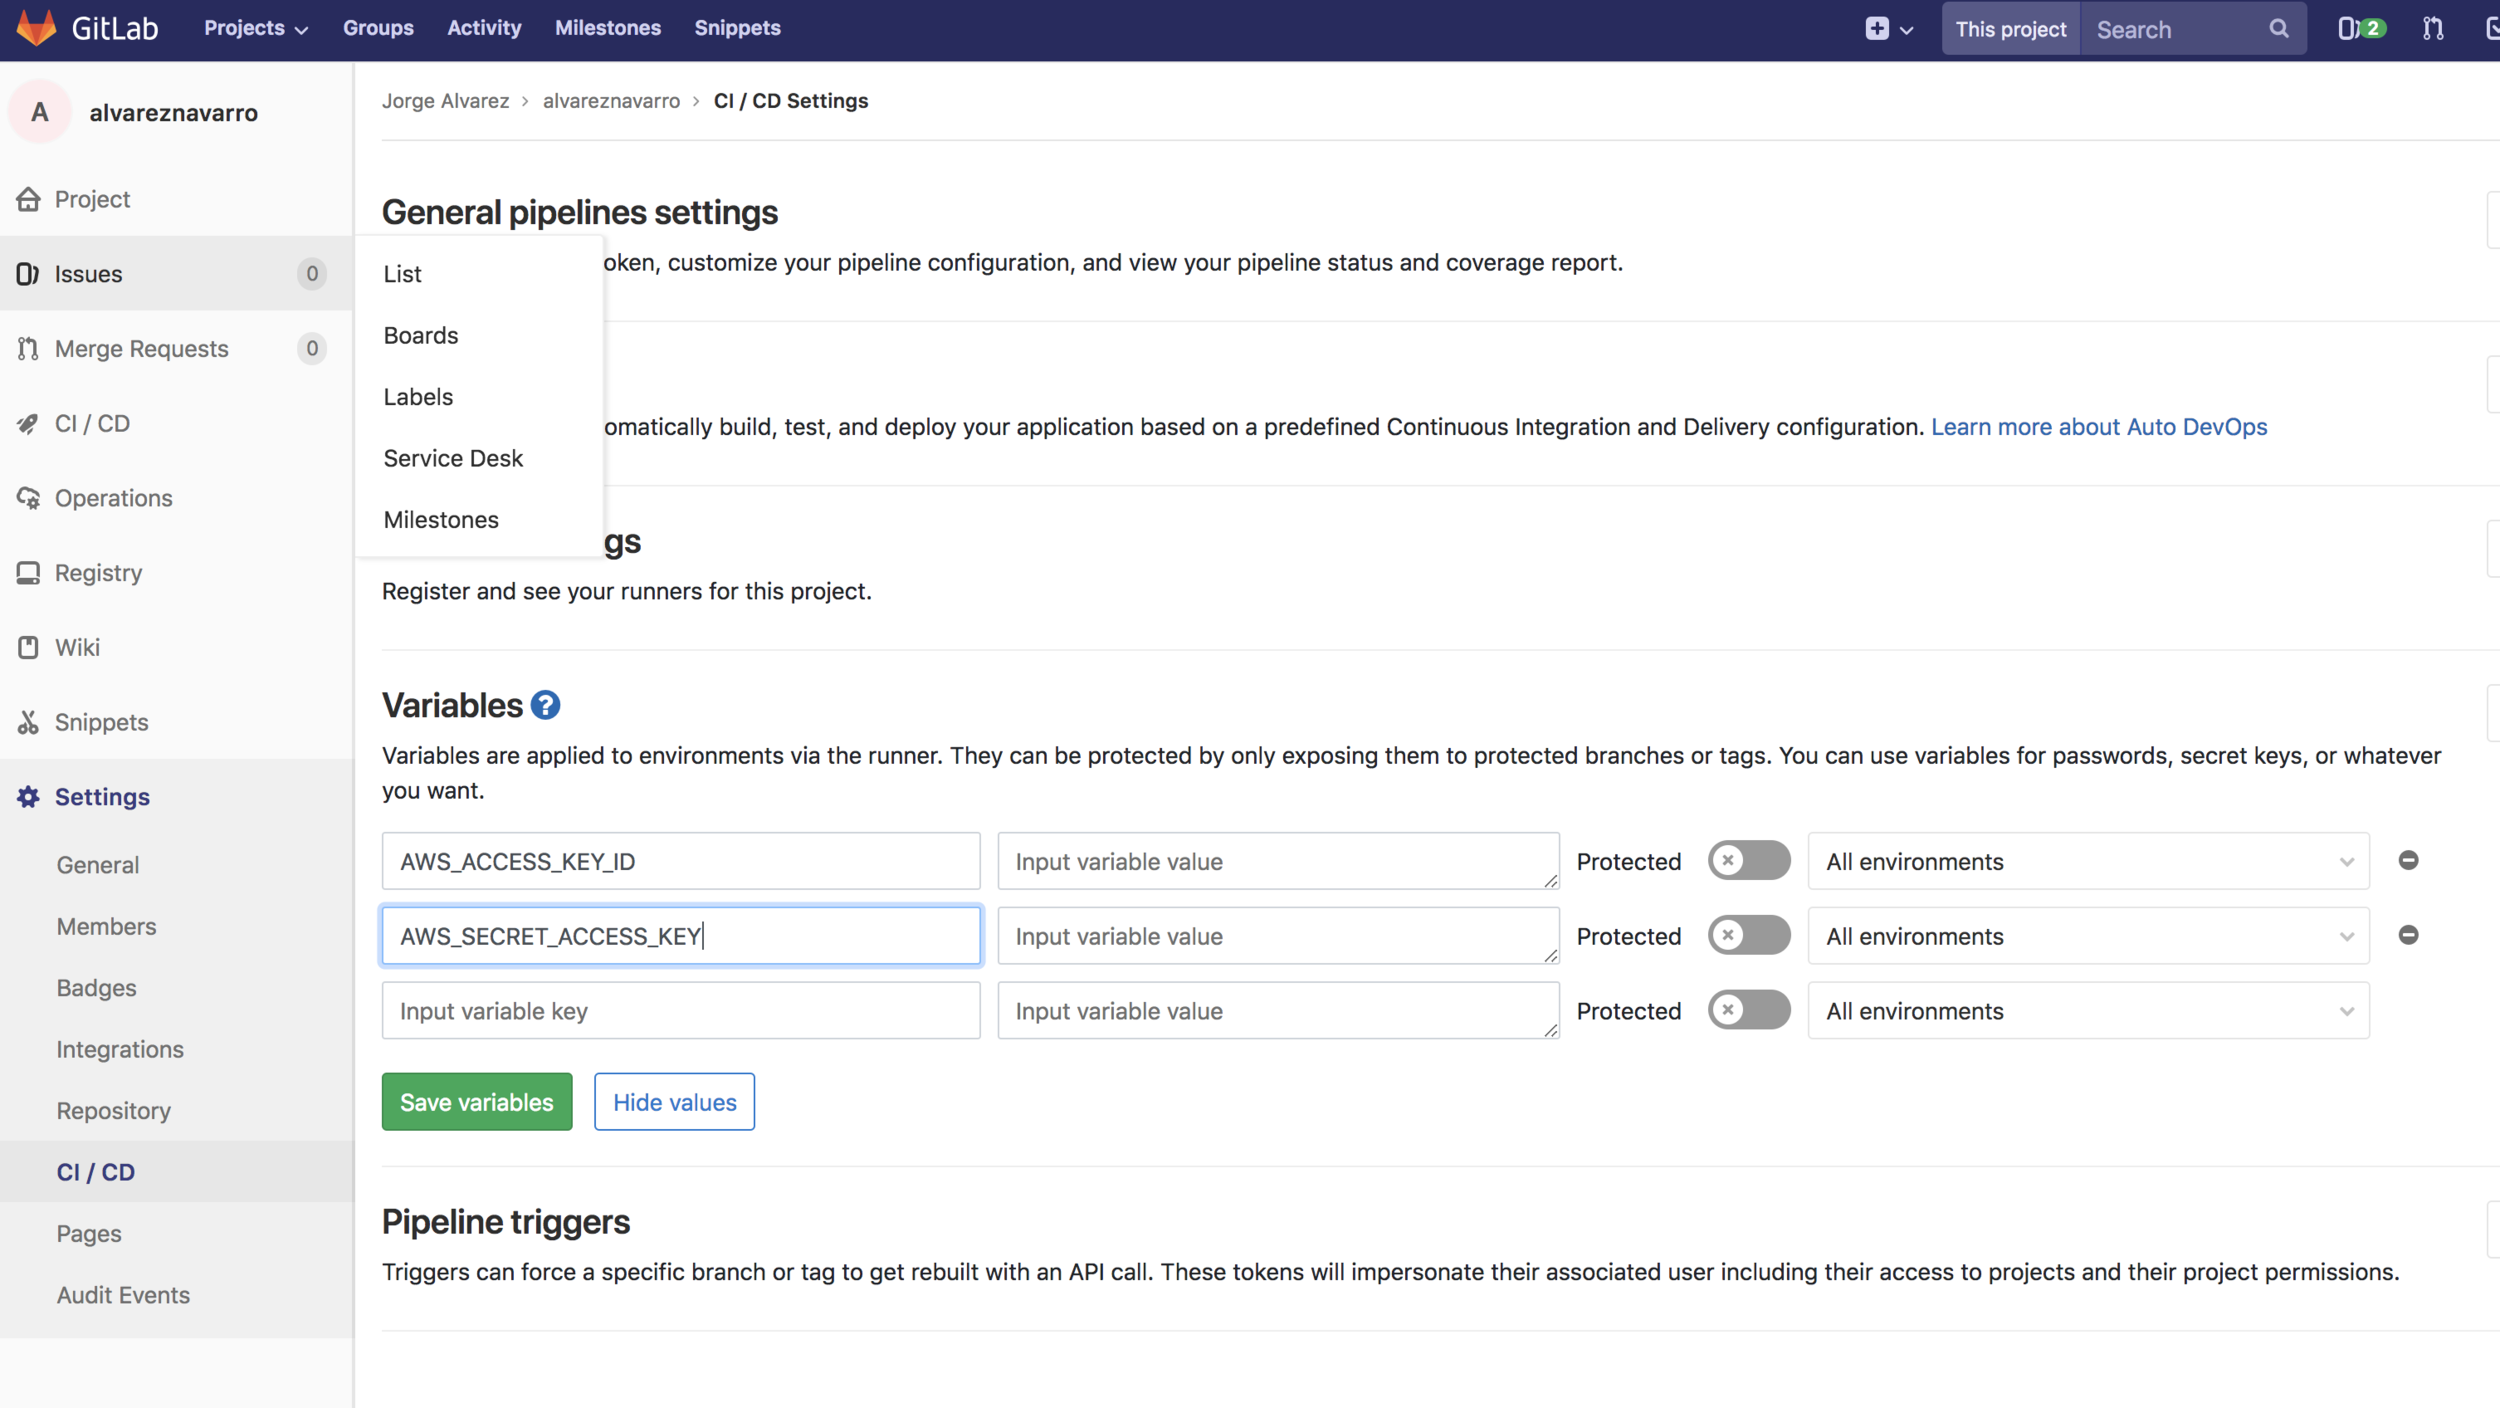
Create these two variable name and paste the corresponding values. Now when Gitlab tries to deploy our website to S3 it will authenticate using these credentials.
Gitlab is ready. This is a summary of the steps in Gitlab
- Create a repository in gitlab.
- Go to settings and add the credentials from the Amazon user.
Step Three: Create the website
Time to create or brand new GatsbyJS website.
First you need to install GatbsbyJS which is very easy. Go to the terminal and write:
npm install --global gatsby-cli
Now create a new website like this: (again mine is called alvareznavarro, yours can be called whatever you like).
gatsby new alvareznavarro
cd alvareznavarro/
gatsby develop
If you have followed these steps open a browser and visit http://localhost:8000 and you should see a default site.
Our next step is also the last one. We are going to deploy this website to our Amazon S3 bucket.
Create a new file in the root of your GatsbyJS repo called .gitlab-ci.yml then copy/paste this code (remember to change the bucket name and use your own):
image: node:latest

stages:
  - build
  - deploy

variables:
  BUCKET_NAME: alvareznavarro

cache:
  paths:
    - node_modules/

buildGatsby:
  stage: build
  script:
    - npm install
    - ./node_modules/.bin/gatsby build --prefix-paths
  artifacts:
    paths:
    - public
  only:
    - master

deploys3:
  image: "python:3.6.6"  # We use python because there is a well-working AWS Sdk
  stage: deploy
  dependencies:
    - buildGatsby
  before_script:
    - pip install awscli # Install the SDK
  script:
    - aws s3 cp public s3://${BUCKET_NAME} --recursive
  environment:
    name: 's3-deploy'
    url: http://${BUCKET_NAME}.s3.eu-central-1.amazonaws.com  # This is the url of the bucket we saved before
This script has two parts: One called build where we generate the website using gatsby build. The generated website will live under a directory called public.
In the second part of the script we copy the contents of the public directory to our S3 bucket.
Now let's make everything work. It's time to push all the contents of our repo to Gitlab. Because this is a new directory we need to sync it with our Gitlab repo write this:
git init
git remote add origin git@gitlab.com:yourgitlabuser/yourrepo.git
git add .git commit -m "Basic layout"
git push origin master
We are initialising our local directory as a git repo then we add the Gitlab repo as the origin and after adding all files content is committed and pushed to Gitlab.
Now you just need to wait a few minutes and the contents of your website will be compiled and uploaded to your S3 bucket.
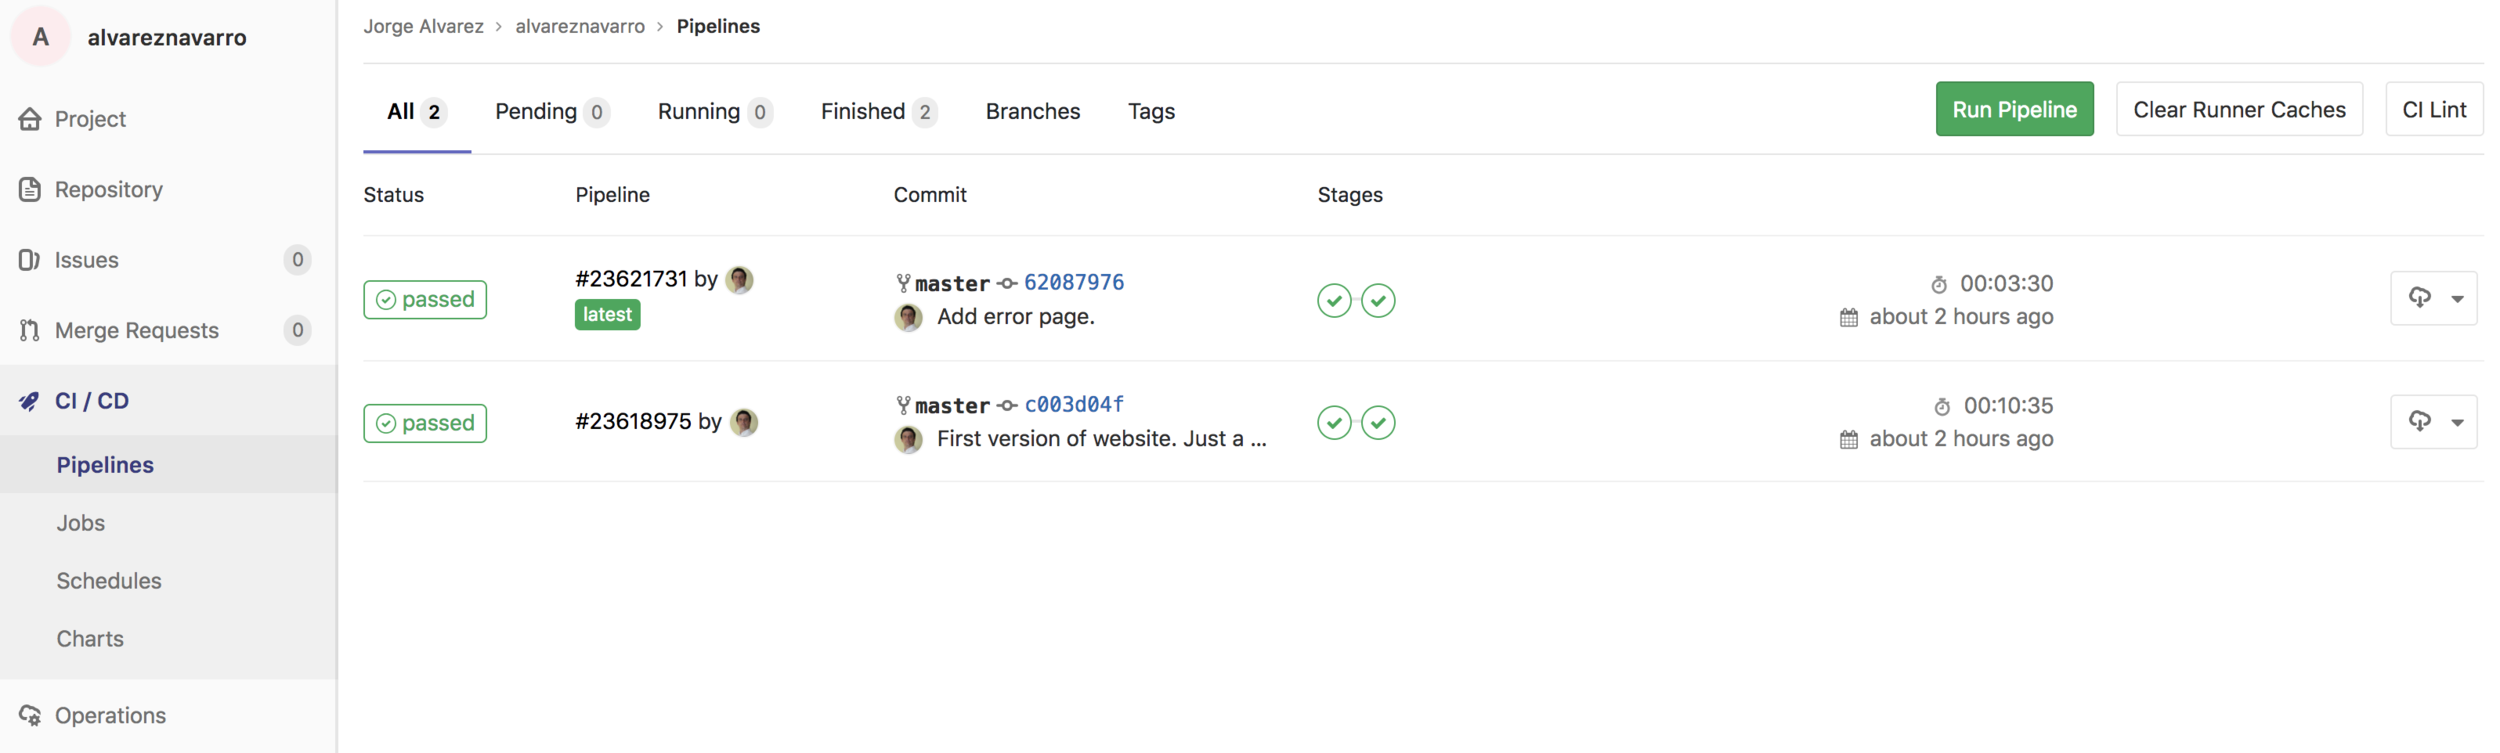
You can check the status of the process in Gitlab inside CI/CD -> Piplelines
Time to summarise all steps we did on our computer:
- Create a new GatsbyJS website.
- Add a file with steps to build and deploy our website.
- Commit and push your changes.
Summary
And that's all. Now you have a website that will be updated every time you push changes to your gitlab repository. It's easy and secure.
I would like to thank Riccardo Padovani for his post:AWS S3 + GitLab CI = automatic deploy for every branch of your static website. This very post has been heavily inspired by his work.
As I progress in creating my blog I'll add new posts explaining what plugins I'm using, theme, add ssl and custom domain.