Developing a web application with Meteor and React
This is the first part of a series of posts explaining how to create a web application using Meteor and React.
I have decided to create a chat application (yes, another Slack wannabe). I will do it incrementally starting with a basic scaffold and improving it iteratively. Don't worry if you have very little knowledge of one of those technologies or even both of them. I am going to start with very basic stuff so it will be easy for you to follow the posts.
This are some of the tools and libraries we are going to use in the project. I don't want to explain everything in detail from the very beginning. We will see them in more detail as we start using them.
- We will use Bootstrap 3 with SB Admin 2 as the main template.
- A package that integrates React and Meteor React-Meteor.
- Collection2to create our Mongodb collections.
- JSX as the default syntax for React.
- CoffeeScript instead of javascript.
I assume you already have Meteor installed on your computer. If you don't then please, install meteor and come back once you are finished.
Disclaimer: By no means this tutorial represents the only/preferred way to develop Meteor and React applications. There are other routing packages, you can develop Meteor apps without Bootstrap or Collection2. You don't need CoffeeScript at all if that is not your cup of tea. I use them because I just like how everything integrates together and it allows me to develop Meteor apps while having fun.
Let's start (Instant gratification)
Clone this github repository and use the branch step0 that has all the code we will use on this first iteration:
git clone git@github.com:jorgegorka/jachat.git cd jachat git checkout step0
Start the meteor server:
export MONGO\_URL=mongodb://localhost:27017/jachat && meteor
We have done two things in just one line. We are saying meteor that our database name is jachat (you can change the name if you don't like it) and we are also starting the web server. Go to your favorite browser open it and write: http://localhost:3000 You should see something like this:
[caption id="" align="alignnone" width="596.0"] 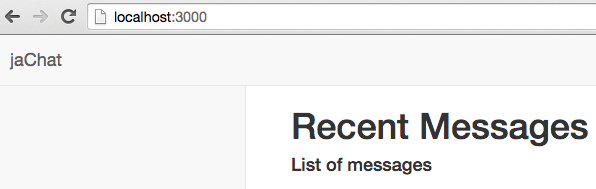 And we haven't open our text editor yet... [/caption]
Let's see what we have here. Our web server is working and accepting requests at port 3000. We are also displaying some static text with a very basic format. It says "List of messages" but there are no messages displayed which is fine because we didn't have added a single message yet, time to solve that.
Open the Developer Console of your browser. If you use Chrome as your developer browser just right-click on the page and press "inspect element" and then press "Console". Now write this:
Messages.insert({description: 'My first message from the console'});
After you press intro you should see the message under the "List of messages" title. Like this:
[caption id="" align="alignnone" width="619.0"]  Text editor: who needs one? [/caption]
Awesome!! isn't it? Try adding more messages changing the description. They will appear automatically. You can even stop the web server and start it again and the messages will still be there. They have been saved in the database for you and you didn't event open your text editor yet (I think I already mentioned that).
Meteor's been doing a lot of things and it is time for us to know exactly what. Let's dig into the code.
Meteor database and collections
If you look at this line "Messages.insert({description: 'My first message from the console'});" it is clear that there is a collection called Messages with a field called description, where does it come from?. This is the perfect time to open your favourite text editor and read some code.
I have created the Messages collection in two separatefiles.
First open lib/collections/collections.js Inside this file I have declared the Messages object as a Mongo collection. Objects inside this file must be available globally so this file is created in javascript not coffeescript.
Now open lib/collections/messages.coffee this is where I have created a collection called Messages and some fields using the package Collection2 created by Aldeed. With this package is very easy to create a collection adding fields, default values, validations and even indexes.
Go to the browser console and type this:
Messages.findOne();
You should see something similar to this:

There are two fields: chatRoom and createdAt with default values that we have defined inside our collection and have been added automatically.
It is very easy to create a Meteor collection but, where is that information stored and how can we see that in the browser console when we write "Messages.findOne()"?
The answer is very simple Meteor stores all data in the server using Mongodb but it also synchronizes that data with the client using "minimongo" a client-side implementation of Mongodb that works in the browser. If you are viewing the details of a message and you request another message the content will load immediately because all data was already on the client so when you write "Message.findOne()" on the console the result appears immediately because the message was already there. We save a trip to the server and the client sees the data very fast improving the user experience.
If the data on the server changes, Meteor will synchronise it automatically.
Autopublish is a package that is included by default on every new Meteor project and it takes care of publishing all collections to the client. With autopublish all the data we have on the server is also available on the client. As you may be thinking this is good only if we have a small amount of data, not to mention security. Imagine that you have 450k messages. You don't want to send that information to every browser that visit your application. We will remove that package eventually, but we have just a few messages so we'll keep it for now.
That's enough information about collections for now. Now it is time to talk about routes.
Routing in single page applications
Meteor is a modern web development framework that createssingle page applications (SPA). You can think of a SPA to be very similar to a desktop application. In a desktop application there are no routes or pages. You interact with the application: write content, press buttons or menu options and the screen changes to reflect those interactions.
In a traditional web application when the user clicks a link or press a button a new request is made to the server which creates a new page for us send it to our browser and then the browser renders it. Every time the server send us a new page it needs to send all the resources associated with it: images, css, javascript, json,html, etc. To improve efficiency we use Ajax to request only portions of the page.
In SPA we load the page once with all the resources and then because everything happens inside that page we don't need to request all resources again when the content of the page changes. We will still request data to the server, but we will do that in the background.
So why do we still need routes? Basically, because it's good for the user. Browsers save our navigation history as a sequence of pages we have been visiting. When we press the back button we expect the browser to load the page we just visited before. We bookmark pages that we like to return to them later on. All of this behaviour is lost if we just create a SPA.
To create the illusion of routes in Meteor we will use a package called Iron-Router that will change the url in the browser to mimic a traditional web application. Keep in mind that this are client routes. We are not requesting a page to the server and loading it. We are just using a feature in HTML5 called pushState and replaceState to create the feeling of "navigating to another page". Iron-Router has some other nice features also like server routes just in case we need them.
Open lib/routes.coffee first you see 5 configuration lines where we define the default template for our application, the 404 page, or the default controller to use.
Those controllers are not the C in MVC. Theyare just files that help us configure some options based on the route we are using. Open lib/controllers/public_controller.coffee and you will see that we are defining a layout template here. We can now create an admin controller and define something like layoutTemplate: "adminLayout" and we can point all admin routes to this admin controller and show a specific layout for that routes. We will see more uses for controllers in next iterations.
Let's go back to lib/routes.coffee in line #8 we are creating a route called "/" (the default or home route) and we are saying to iron router that when the browser points to this url it should render the content of "dashboardIndex" using the configuration in public controller. DashboardIndex is a template and that is where we will add all the html and the logic we need to show the right content to the user.
Views... finally
Meteor ships with Blaze that is in charge of creating reactive templates. We are going to use React instead of Blaze and React as you can imagine is (React)ive as well. What is reactive? you may be wondering. Let's see it in action with a demo. Open two browsers and go to http://localhost:3000 resize both browsers so you can see them and create a new message in the console of one of them.
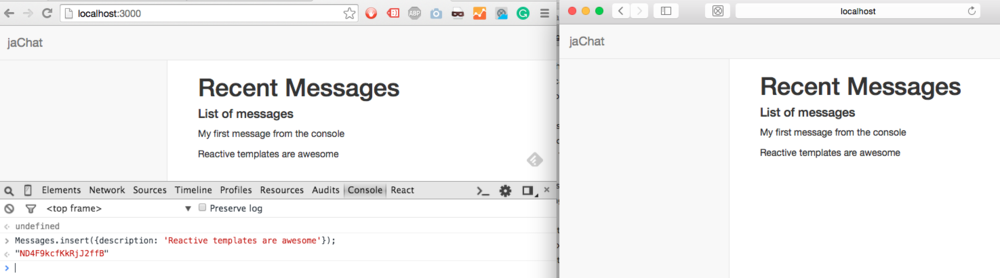
Reactive templates are awesome!
Now you have seen a reactive template in action. When you add new content in one browser not only it updates itself to reflect the changes but also all other browsers that display the same content are updated automatically. The template detects that the content its displaying has changed and it updates itself automatically.
Reactivity comes with a cost. Updating a page means that you need to update the browser's DOM and that can be slow if not done efficiently and can result in poor user experience or unresponsive pages. React claims that it can do all the changes really fast by working with its own virtual DOM where it renders the current page and the new one with the changes. It computes the difference and applies the changes in the most efficient way.
Let's open the React file. Open client/templates/dashboard/index.cjsxthere are three React components here: DashboardIndex, MessagesList and MessageContent. We could have written everything into one component, DashboardIndex for instance, and the result would have been the same but as our application gets more complex having just one big component is not very easy to maintain.
React encourage usto divide the page we want to display into small atomic pieces of functionality and create a component for each of this parts. This is how I divided the page:
[caption id="" align="alignnone" width="736.0"]  React components [/caption]
The content inside the red box corresponds to the component called DashboardIndex that will render the page title and the list of messages. The blue box is the MessageList that will render the list title and every message. Finally, the green box with the message content will be rendered by the MessageContent component.
Thanks to this division the three components are very simple. Let's see how they work. Open the index.cjsx file again and take a look at DashboardIndex. You will first notice that we are creating it using ReactMeteor.createClass while the other components are created using React.createClass. ReactMeteor has been included by the React-Meteor package and allow us to fetch reactive data. In line #6 we have a method called getMeteorState that fetches content from a collection and saves it in a React state (more about React state later).
In line #2 there is a property called templateName. This name must match the name we assigned to the template in the routes file and it is the way the route knows which template it should use. Starting in line #9 is where we render the content to the browser. We are rendering some basic html and another React component: MessagesList. We are also sending the content of the messages we just fetched from the database to the MessagesList:
\<MessagesList messages={@state.messages} /\>
React can store data both in props and state. Props (abbreviation for properties) are one-way data containers. This is where you should store most of the data you use inside your components. Once props get a value they don't change. On the other side, we have state. State are two-way reactive data containers and its value can change. If another user adds a new Message the content of the message variable, line #7, will change and the MessagesList component will be notified of this which will result in a new MessageContent being rendered.
Now it's the turn to examine MessagesList. Go to line #23 we are displaying some basic htmland the content of a variable called messagesList. Go to line #19 and you will see that messagesList is just an array of MessageContent components. We are iterating through the messages data we get from DashboardIndex and we are creating a MessageContent component for each message. We are also assigning a value to two variables inside MessageContent: key and description.
\<MessageContent key={message.\_id} description={message.description} /\>
Now it's the turn of MessageContent which is the simpler of the three componentsit only renders the content of the description, that's all.
By dividing the functionality of the page into small parts, we've been able to create three simple components very easy to understand and read. DashboardIndex fetches information from the database and sends it to MessagesList every time it changes. MessagesList iterates over this information and generates a MessageContent for each message and finally MessageContent displays the content of the description field.
Summary
We have seen quite a few things in this first post of the series. We have now an application that is functional, not very much though,and which you can use to start playing with. In the following posts, we will see how to add messages inside the app, add accounts and login, public and private chat rooms...
I am looking forward to your comments and suggestions.
P.D. June 15th - Thanks to Joshua Owens for asking me about a naming hack I did before. I realize it was unnecessary.